Shadowsocks is a free open-source SOCKS5 proxy widely used to protect privacy on the Internet. It is used to connect to the Great Firewall of China or have a higher level of anonymity (trade bitcoins, etc.).
Shadowsocks-libev, written in C, ports Shadowsocks to create a regularly maintained, lighter and faster version of the original Shadowsocks. The data passing through the Shadowsocks-server and Shadowsocks-client is encrypted and can be made indistinguishable from any other web traffic to avoid third-party monitoring.
In this tutorial, we’ll show the steps for installing and configuring Shadowsocks on a cloud server, configuring the proxy server, and using a client to connect to the proxy.
The instructions are given here are for opnsense appliance but we have another tutorial for CentOS 8, Debian 10 and Ubuntu 20 version. The process is similar on any operating system that is supported by Snap.
- First step is to access opnsense dashboard
- then navigate to System > Firmware > Plugins
- then select Shadowsocks plugin for installation
- Once installed, it should look like this:

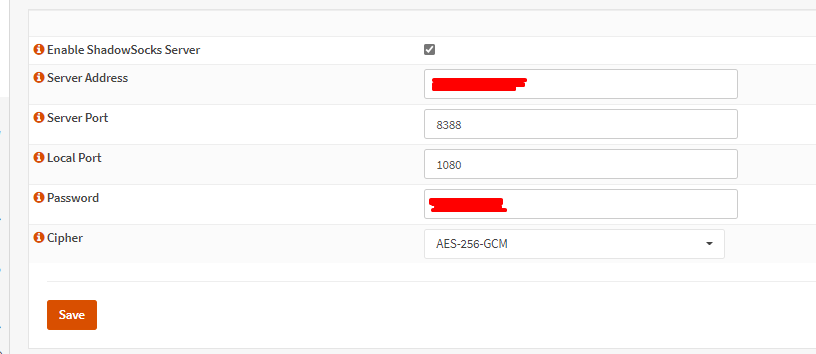
- Once the installation is complete go to Services > Shadowsocks menu
Click Enable Shadowsocks server
For server address enter the public server ip to listen to
For Server Port enter the server port you want the service to listen to
Local port, you can leave this as default 1080
Configure a password
Configure a strong cipher (we recommend aes 256 gcm)
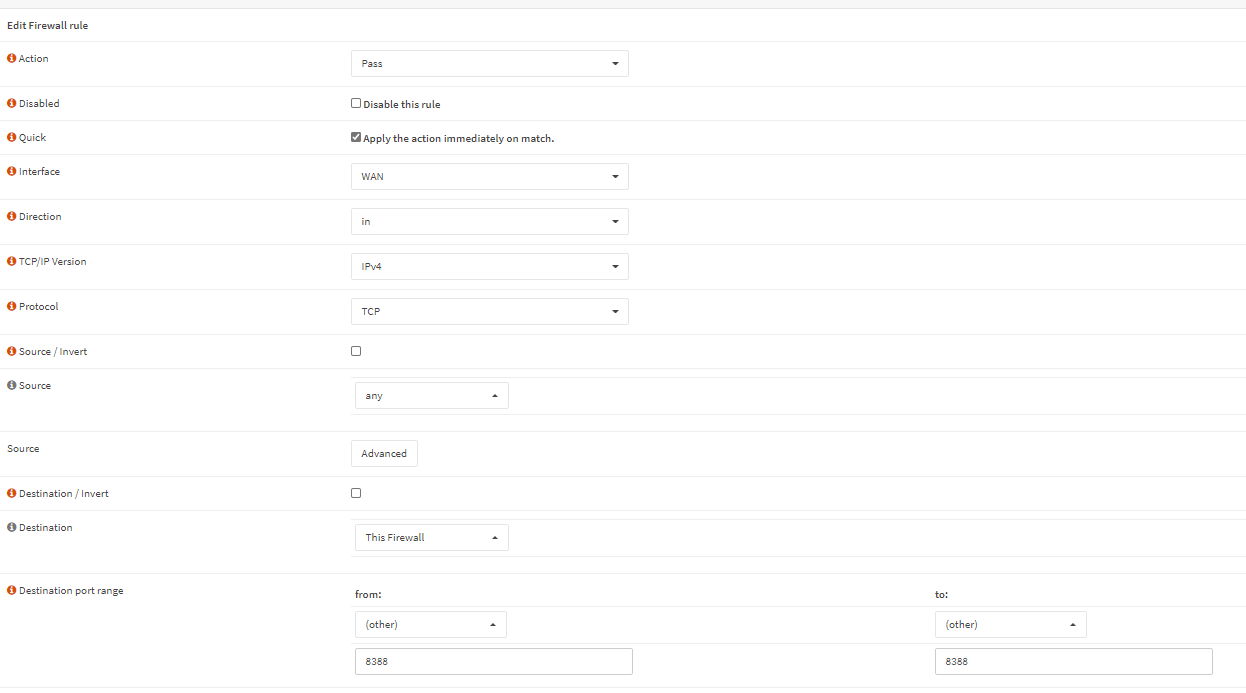
- Add a firewall rule to allow access to port 8388:
Firewall > Rules > Wan > Add
Protocol: IPv4 TCP Source: * 
- Download and install shadowsocks client for your OS (Windows in this case).
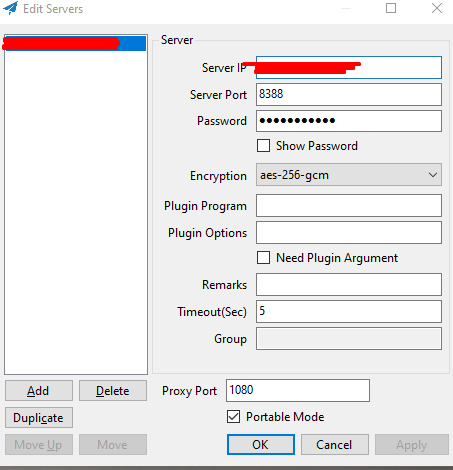
Shadowsocks-4.3.3.170.zip - Configure the client as per below instructions:
The password should be the same as the password you configured in the server side.
- Click ok. Next go to your proxy settings and setup socks proxy 127.0.0.1 as your proxy (on port 1080) .
- Next ... you are done, you should be able to browse the internet using the new ip.
Also check our speed test for shadowsocks proxy server.
https://gss-portal.com/knowledgebase/86/Speedtest-Openvpn-versus-shadowsocks-proxy.html


